Blog

  • Worry-free cookies and bread that everyone can enjoy 🍪

    Worry-free cookies and bread that everyone can enjoy 🍪

    Discover Red Bandana Bakery owner Jaimie’s most popular treats in the February edition.

    Gluten-free. Nut-free. Dairy-free. Sugar-free. Care-free. Jaimie’s welcoming storefront on Wisconsin Ave. matches the bright bandana she dons while baking.

    Welcome back to The Sunday Roast!

    This month: I’m still on the hunt for subjects for the newsletter, though everyone I’ve reached out to or interviewed so far has been a delight! I’m very excited to feature some local chefs that some Washingtonians may even recognize. My ongoing goal is to diversify my subjects to make sure I’m talking to all the different people that live in this beautiful city/area. I am still very open to any suggestions people have, including who or what you’d like to see featured in future newsletters. Just fill out my suggestion form! My subscriber count has now gone up to 76 and I hope to keep growing that with a new goal in mind.

    Some background: In a monthly newsletter, I combine a DC local’s story behind their favorite recipe(s), or ones that whip up some nostalgia, with photos and prose of my attempt at replication. These recipes vary in difficulty, but they are always ones close to the heart. This newsletter is sent on the third Sunday of each month as the name suggests.
    A fun note: Make sure to mark this email as NOT spam to avoid the newsletter regularly ending up in the abyss. Sometimes Mailchimp email campaigns go straight to spam.

    Meet Jaimie.

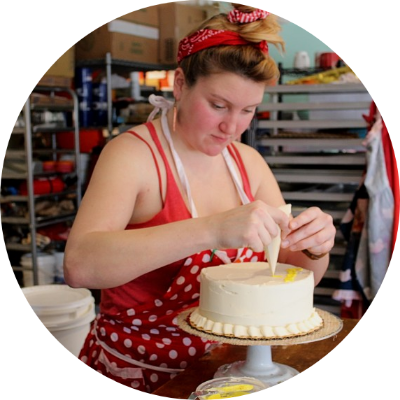
    It all started when Jaimie was sitting in her college graphic design class. She thought the work would involve creativity, something she wanted in a career, but she realized she did not want to sit behind a computer for the rest of her life. So Jaimie set off on a new career path: a baker. She attended L’Academie de Cuisine in Gaithersburg, MD, and discovered that baking was her passion.

    After a few stints at hotel kitchens, bakeries and restaurants in the area, she rediscovered her entrepreneurial spirit and decided to open up her own storefront. Jaimie wanted her own space to do whatever she wanted, and she had the perfect idea to get started. There was a market for healthy baked goods that were allergen-free, and Jaimie was going to fill it. Inspired by her younger brother, who had autism and stuck to a gluten-free casein-free diet, she began to take orders for worry-free, gluten-free cakes through a website, baking all night in her home kitchen. After she decided her home-grown business was a conflict of interest with her day job at Wagshal’s. Jaimie quit, entered a start rate competition at the Maryland Women’s Business Center and won. She talked to a real estate agent and other contractors, that helped her open her bright and cheery storefront in 2017.

    Jaimie crafts new and innovative vegan, gluten-free, sugar-free and nut-free recipes at her store and frequently makes cookies and cakes with pop culture references, like Schitt’s Creek cookies for Valentine’s Day. Jaimie wants to make her bakery a place for people to sit at, feel at home and become a part of the community. She gives private lessons, hosts children’s birthday parties and open mic nights, and she’ll even make you a homemade sandwich to have you stay awhile. The name matches the care-free environment of the bakery, inspired by Rosie the Riveter and Jaimie’s first time working at a restaurant that didn’t require a skull cap. 

    Explore her bakery’s website. Discover her Instagram.

    The story behind her recipes.

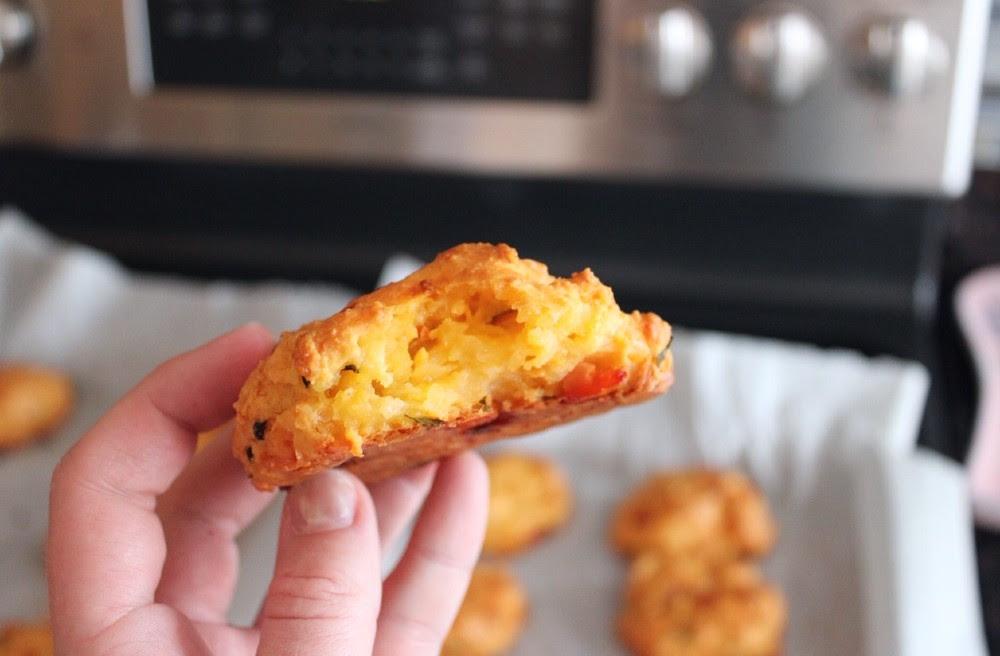
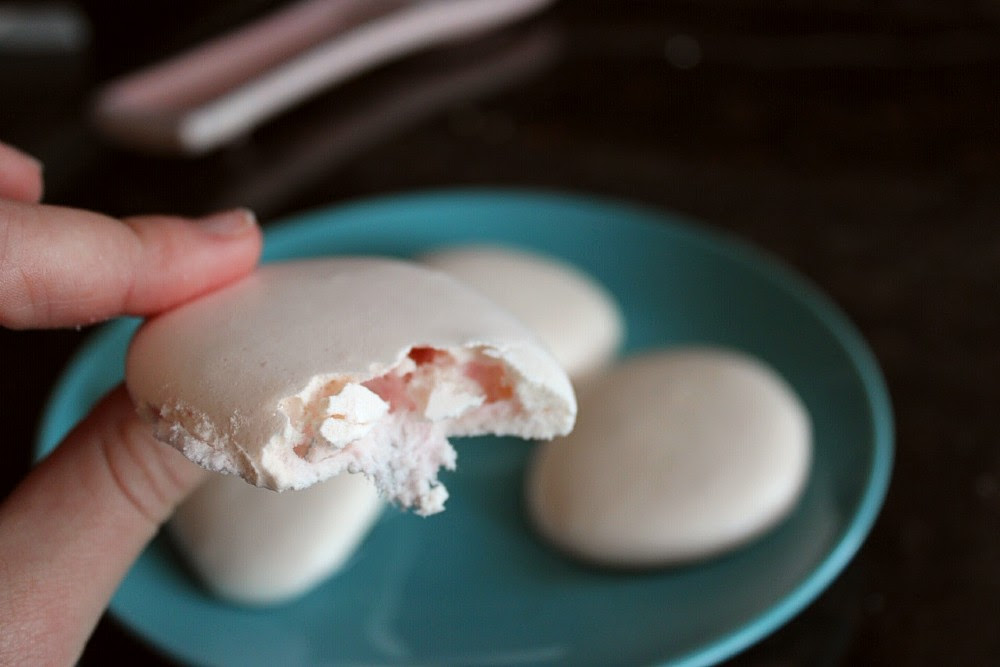
    Pictured above are Jaimie’s beautifully baked meringue cookie and tomato basil cheezy bread. Disclosure: mine don’t look as good, but to be fair, I don’t have a culinary degree. I got to sample both of these lovely baked goods on a Sunday morning just after the bakery opened when there were only a few customers trickling through. Jaimie was kind enough to take the time to sit with me when I’m sure she was busy trying to fulfill orders. I originally met Jaimie through my last subject, Laura Zimmerman. She recommended I reach out to Jaimie because she loved her bakery, and Jaimie immediately agreed to meet with me.

    I chose a spot on one of her cozy couches in the homey storefront. Jaimie sat with me and began recounting her story of how she became a successful baker in the Bethesda community, with her brother being her inspiration. Jaimie will travel to farmers’ markets frequently in an old, red Volkswagen van, and when I asked her what her most popular item is, she launched into a story of her cheezy breads. The egg and potato starch-based rolls are a huge hit at her store and at farmers’ markets, but when Jaimie tries a flavor other than her tomato and basil combo, like a pumpkin sage or Old Bay bread, customers will say they’re coming back next week for the pizza-flavored roll. She says the roll, which is her favorite to make, is quite similar to and inspired by Brazilian pão de queijo — a cheesy, eggy bread. 


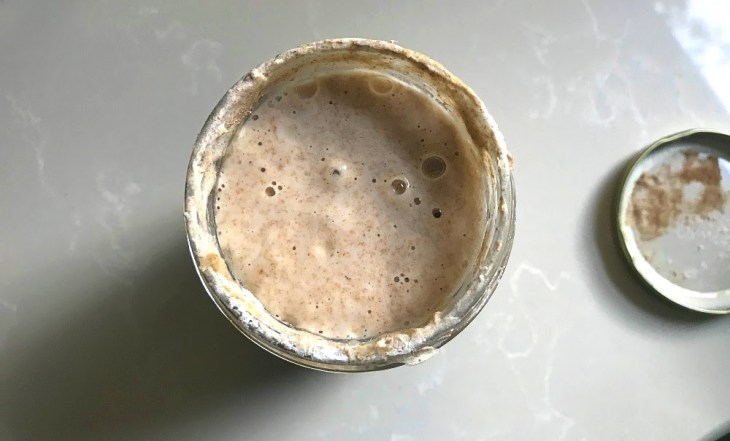
    The Brazilian way is more gummy because it uses tapioca starch, but Jaimie experimented to achieve a better texture and ended up using potato starch, which has a more neutral flavor. The way the dough is made is also similar to a French choux, where a starch and melted butter make a roux before mixing in eggs slowly. Jaimie makes the rolls big enough that you can slice them in half and put some chicken in to have a nice sandwich, and sometimes she’ll make them small enough for a bite-size hors d’oeuvres. She recommends these rolls as an easy way to impress guests, while also playing around to find flavors you like, such as adding kimchi to the batter. Both the roll she served me at the bakery and my recreation were extremely delicious and addicting, so I highly recommend making these for your lunches this week.

    Now onto the cookie for those with a sweet tooth (also known as me). I was pretty shocked when Jaimie offered me a vegan meringue at the bakery and it had the same melt-factor and tart flavor that any other meringue with egg whites would have. I’ve heard of aquafaba, or chickpea water, before simply because I watch a lot of baking shows, but I had never experimented with the ingredient before. Jaimie had found several online recipes for vegan meringues using chickpea water and adjusted them to fit her own idea of creating cookies. She’s even made variations where she pipes smaller meringues and refrigerates them so they turn gooey like marshmallows, and then she places them in her famous bonfire cake — one of her most popular items at the bakery, along with its brownie variation. To avoid wasting the chickpeas, Jaimie uses the leftovers after draining the water to make hummus, chickpea scramble or blondies. The only issue with these delicious cookies is that they occasionally fail since meringue can be a fickle thing, but for this recipe, Jaimie played with the ratio of sugar to make sure it works most times. While she still gets a customer once in a while that thinks they won’t enjoy the cookie because it’s vegan, Jaimie says she’s been nothing but encouraged by other chefs to continue creating innovative recipes. Plus, that customer usually ends up loving the cookie.

    Learn the step-by-step of how to make Jaimie’s cheezy breads and meringue cookies.

    Click here for all the recipes!

    Processing…
    Success! You're on the list.
  • Be the hostess with the mostest (and the best drinks) 🍹

    Be the hostess with the mostest (and the best drinks) 🍹

    For January’s edition, I talked zero-proof cocktails with Booze Free in DC’s founder.

    Welcome back to The Sunday Roast! Apologies if you’ve received this twice, but Mailchimp somehow sent the first email at 10am to only a chunk of subscribers and not everyone.

    I was overwhelmed by the outpouring of support from subscribers for my first edition. I’m also thankful to everyone that offered feedback and I am still very open to any suggestions people have, including who or what you’d like to see featured in future newsletters. Just fill out my suggestion form!

    This month: I messaged and emailed several lifestyle bloggers, chefs and DC foodies to find subjects for the next few months of this new year. Thankfully, I had several responses and will be booked for the next couple of months. My subscriber count has gone up to SEVENTY FIVE after lots of social media outreach (including supportive posts from my parents). I’m so excited to see where this newsletter continues to take me.

    Some background: In a monthly newsletter, I combine a DC local’s story behind their favorite recipe(s), or ones that whip up some nostalgia, with photos and prose of my attempt at replication. These recipes vary in difficulty, but they are always ones close to the heart. This newsletter is sent on the third Sunday of each month as the name suggests.
     A fun note: Make sure to mark this email as NOT spam to avoid the newsletter regularly ending up in the abyss. Sometimes Mailchimp email campaigns go straight to spam.

    Meet Laura.

    We meet in Compass Coffee and had a cute photoshoot!
    Laura loves to travel. She also loves all the things that come with travel, including trying new food and drinks and visiting historical spots. But about a year ago, she noticed that most travel guides include 50-page sections on the best bars, dives and breweries. While that may be ideal for other 30-somethings with the travel bug, Laura is 12-years sober. So she decided to fill this niche market and launched Booze Free in DC, a website that features what she calls the four tenets of travel: eat, drink, play and renew — but the twist is that every activity featured is booze-free.

    Laura’s sober journey is a long story, one she warned me of once my first question sparked a 30-minute conversation about it, but suffice it to say that she made the decision to be free of alcohol forever because she has an addictive personality. About five years ago, she felt she was lacking a community in DC that was full of people in similar situations, so she launched her own blog interviewing creatives that were loud and proud about their sobriety while also making an impact on their community. Her blog was full of resources for people who not only needed help, but wanted to find films, books and podcasts that appealed to their sober lifestyle.

    And while this passion project launched Laura onto the sober scene, she soon felt stuck. Enter in Chris Marshall of zero-proof Sans Bar in Austin, Texas. Laura loved the city after visiting several times. She contemplated a move there, but ultimately, decided to stay in DC (and we’re thankful for that) in order to invest more energy in building a booze-free community here. She’s still good friends with Chris and has organized and worked at several events with Sans Bar ever since they launched a national pop-up tour. One of her events was even at my alma mater, American University! Laura taught students how to make zero-proof cocktails as a way to socialize without the crutch of alcohol. 

    Now, things have been looking up for Laura in DC as she continues to be featured by local news organizations, including Washingtonian and The Washington Post. The launch of her website this year was successful in welcoming people from all walks of life to the booze-free community, including pregnant people, designated drivers or those looking to cut some alcohol out of their diet. Her sights are still set on a booze-free travel guide to DC that will include interviews of locals who can act as tour guides, which she one day hopes to launch for other cities as well. She thinks this city, which ironically is frequently dubbed one that relies on alcohol for business and socialization, is becoming more open and inclusive to those who chose to live sober, and she’s happy to be part of that movement. (And yes, she hates the word mocktail. She said it’s like nails on a chalkboard.)
    Explore her website. Discover her Instagram. Or her organization’s account.

    The story behind her recipes.

    In honor of Dry January, Laura and I talked all things booze-free one unusually warm Saturday morning at the Spring Valley Compass Coffee. I had reached out to her on Twitter after reading her profile in Washingtonian, and she immediately agreed with the caveat that she wasn’t much of a cook. After I explained that the newsletter features DMV locals with a story to tell, and includes recipes of all kinds, including drinks, Laura knew which recipes to choose. 

    I suggested she choose a nostalgic food recipe to pair with a refreshing cocktail that she could suggest for anyone hosting friends or family. For the food, she chose a clam dip that sparked memories of her grandmother and mother. For the zero-proof drink, Laura picked a ginger mule made by Chris Marshall with a #MadeinDC twist.

    The star of any dinner party or gathering with snacks is usually the food, but in this case, Laura’s autumnal cocktail, a rosemary ginger mule, shines. She said she chose this fresh drink because it was crafted by her dear friend Chris Marshall, owner of the zero-proof Sans Bar, to serve to AU students at the bar’s pop-up event. Laura has always loved ginger ale, so the added ginger beer to this drink, plus the fresh rosemary, made her a big fan. She did add her own twist to the recipe, however, by suggesting a dash of shrub from a local business in Arlington called Element Shrub.

    She specifically recommended the cranberry hibiscus apple cider vinegar-based reduction to match the drink well with her Thanksgiving-esque dip recipe. The best part of this drink is the freshly-spanked rosemary (yes, you read that right.) Laura says spanking the herb is a technique in which one claps the herbs together to bring the aroma out more noticeably, and in turn, the rosemary flavor of the cocktail will be stronger. She loves this recipe because it’s easy to make in any setting, and people can play around with the ingredients and amounts to tailor their drink to their tastes. 

    She tied these two recipes together because they not only reminded her of Thanksgiving but also because they’re easy to make for parties. Don’t over-complicate the recipes, she said, and you’ll have some delicious snacks and drinks that everyone will rave about.

    Click here to learn how to recreate the refreshing mule and creamy dip!

    both perfect for hosting a party

    Processing…
    Success! You're on the list.
  • Nothing beets a home-cooked meal 🍴

    Nothing beets a home-cooked meal 🍴

    Thank you for joining my subscriber list! Enjoy the December, and very first, edition.

    Steamy borsch that’s fresh off the stove.

    Welcome to the first edition of The Sunday Roast! My name is Emily and I am so excited to see this passion project of mine come together. I want to take a moment to thank all my friends, family and subscribers for their support, and a very special thank you to my first subject: Olga Berman. I had so much fun learning about Olga and her food adventures in DC, so I hope subscribers do, too.

    This month: I worked on outreach to build my audience, then brainstormed names, content and format with Twitter followers and colleagues. After I decided on mixing reporting and cooking, I messaged several local chefs and bloggers until I scheduled an interview, and finally, I’m here with my first newsletter. I also managed to exceed my goal of 50 subscribers, so things are going pretty well!

    Some background: In a monthly newsletter, I will combine a DC local’s story behind their favorite recipe with photos and prose of my attempt at recreating it. These recipes will vary in difficulty, but they will always be ones close to the heart. This newsletter will be sent on the third Sunday of each month as the name suggests.

    Got suggestions for a chef or type of cuisine you want to see next? Fill out my suggestion form!
    A fun note: Make sure to mark this email as NOT spam to avoid the newsletter regularly ending up in the abyss. Sometimes Mailchimp email campaigns go straight to spam.

    Meet Olga.

    She started her DC food blog, Mango & Tomato, in June 2008. An economist during the day,she enjoys trying new foods and restaurants in the area while blogging her favorite recipes, including Russian recipes she revisits from her childhood in Moscow. Her iconic name follows the trend of two foods as a blog name, and Olga chose her favorite fruit and vegetable. She didn’t realize until recently that inspiration had come five years earlier when she was staying at a tomato farmer’s home in Israel, which happened to have mango trees out front. Olga may never use measurements when cooking, which proved to be difficult when posting recipes on her blog, but since she knows exactly how to cook from the heart, her recipes are full of flavor and soul.
    Explore her blog. Discover her Instagram.

    The story behind her food.

    Olga and I met at the pop-up-turned-trendy-restaurant Taco Bamba in Gallery Place. She had requested we meet there after her first time attending a CorePower Yoga class nearby. While I only ordered the breakfast taco (with deliciously spicy chorizo and pickled onions sprinkled onto a soft egg, wrapped in a warm tortilla), Olga ordered her favorites: the roasted squash, breakfast and beef tongue tacos. She told me her mom typically makes beef tongue in a pressure cooker, and while it may seem unconventional, it’s a tasty, nostalgic meal for her. I took her word for the taste of the tongue and pressed her to tell me about her childhood and her relationship with food.

    I originally reached out to Olga on Instagram after discovering her profile in a thread about DC influencers. She immediately agreed and suggested her potato salad as the recipe to feature since it was nostalgic for her. I read through the post on her site about how her mother made the potato salad frequently for celebrations, and I got excited about the potential for a story. I suggested we could add a second recipe to compliment it, so Olga chose her dad’s borsch recipe. Two traditional Russian recipes made by each of her parents throughout her childhood were the jackpot of stories, and they each represent her two parents, she says.

    The potato salad has always been in Olga’s life. She grew up admiring her mother’s uniform cuts of each vegetable, complemented by the perfect ratio of mayo, and then enjoying leftovers for days after. Once they were old enough, Olga and her sister would assist her mother in meticulously chopping everything into perfect bite-sized pieces.  For her, the uniformity of the cut vegetables and cooking the potatoes to the perfect texture are the most important parts of the recipe. The mayo is the tastiest component, according to Olga, but the apples add a sour and fresh element. Some people may add cubed lunch meat or kidney beans, but she keeps it simple. Now, she may not make the potato salad as frequently as her mom did, but her mom makes it every time she visits home, and she whips up a large batch each year to celebrate the new year. Olga confirms she will be making potato salad to celebrate the start of 2020. Naturally, she will cook enough to have leftovers for every meal in the following week.

    Now for the borsch without the “t.” Olga says there is no “t” on the end of the word because the beet soup is spelled without a “t” in Russian, so she and her dad always drop it. Her dad also taught her how to perfect her borsch, which is a comforting, magenta soup full of cabbage, potatoes and, of course, beets. Her maternal grandmother even credits her father for making borsch that is better than her mom’s — high praise, according to Olga. After moving to the US in 1993, Olga and her family continued their diet of cooking several servings of potato salad and borsch, among other things, then eating them for days. Now, Olga makes the soup at least three times in the winter and makes a different version of the recipe in the summer. When I made the soup and updated her on the outcome, she wished she had a big bowl to taste test. Her dad may occasionally throw in zucchini or parsnips, but Olga sticks to the basics for her borsch. The most important ingredient here is the beets, especially some freshly grated beets thrown in at the end for more color. Some people say they dislike the earthy tone of beets, but Olga says she doubts it tastes like dirt because she’s never tried dirt.

    Fans and followers argue with Olga over the origin of the soup, whether it’s Ukrainian or Russian, but she says her mother is Russian and her father is Ukrainian, so she has her bases covered. She says the origin of the soup is up for argument, but what matters is that it’s delicious. 

    Olga doesn’t always make complicated, long recipes, or just Russian food. She typically cooks what she’s craving or whatever’s in her fridge for dinners or meal prep for the week, but her Russian Recipes Revisited series on her blog is full of food she knows like the back of her hand.

    Want to learn how to cook classic borsch and Russian potato salad?

    CLICK HERE FOR THE FULL RECIPES!

    Processing…
    Success! You're on the list.
  • Sourdough bread

    Sourdough bread

    Oh. My. God. My loaf is not perfect by any means but I am so proud of it!! The tang! The crisp crust! The chewy inside! Those air pockets! I cannot believe I made  bread and that it tastes like this. Everybody needs to try this at least once! Melt some butter on this bad boy and nothing can be better. I immediately made soup to dip the bread in as well, and I have no regrets.

    Making tangy sourdough bread with a crunchy crust takes lot of patience, but it’s sure worth it.

    Top tips from me:
    1) Linked below is the 19-minute-long video that The Bread sent to me to follow. It’s fairly easy to follow, though your dough may end up looking slightly different than her’s, as mine did, too.
    2) When adding your starter, it should be about 6-12 hours after feeding when it has risen to its peak. Plan ahead and feed your starter well before you start making your dough.
    3) The measurements, just like the starters, may be a bit off when it comes to converting them to cups, so make sure the consistency of your dough always matches that in the video, even if that means adding more flour.
    4) I ended up only doing the three folds like the baker ends up doing in the video.
    5) Feel free to just use all-purpose flour instead of brown rice flour if you don’t have it. Definitely make sure you use semolina and that the parchment paper is properly cut, though, to avoid your loaf sticking to the dutch oven.
    6) I proved my dough in some Corning ware since I don’t have a banneton, which may have affected the shape. I also bought a dutch oven to bake my bread in, since my research told me that was easier with the steaming process, so another video is linked below to explain how to bake your bread that way.
    7) After talking to The Bread again, my theory is that I should have used my starter 8-12 hours after feeding, folded my dough one more time, shaped it 20 minutes just before baking and increased the temperature to 500 degrees. I will experiment and see what works for a better rise next time!

    Time:
    This recipe is long and tedious, but extremely worth it. It will take about 6-8 hours for you to finally get your dough shaped, then an overnight proof for 12-16 hours, then baking for 40 minutes — so definitely do this on a weekend or slow day at work. You will get one medium sized loaf out of this.

    Ingredients:
    70 g whole wheat flour — 255 g all-purpose or bread flour — 253 g water — 65 g starter (called levain) — 7.5 g sea salt (or table salt) — extra water and flour for folding and shaping — brown rice flour and semolina/cornmeal to sprinkle on loaf 

    The easiest method to bake bread! Follow this video for specific baking instructions.

    Instructions:

    A QUICK OVERVIEW OF THE STEPS: autolyse — levain — sea salt — fold — lamination — stretch and fold #1 — stretch and fold #2 — stretch and fold #3 — shape — proof — bake

    – Add 70 g of whole wheat flour, 255 g of all-purpose/bread flour and 253 g of water to a large mixing bowl. Stir to combine until no dry flour remains and the consistency is a wet yet stretchy dough.

    – Let the dough sit covered for 3 hours. After, wet your hands and gently pull at a section of the dough to make sure it stretches without ripping.

    – Add in 65 g of your starter that has been sitting for at least 6 hours since feeding. Wet your hands again and hand mix in the starter for about 3 minutes until fully incorporated. 

    – Let the dough sit covered for 30 minutes.

    – Add 7.5 g of salt to the dough. Wet your hands and hand mix for another 3 minutes until fully incorporated. 

    – Let the dough sit covered for 30 minutes.

    – Lightly wet the counter and your hands. Scrape dough out of bowl onto counter. Use a wet knife or bench scraper to release the top of the dough from the counter, and then stretch the top out before folding down to the bottom of the dough.

    – Repeat the folds on all 4 sides of the dough.

    – Round the dough and return it to the bowl. Let the dough rest covered for 30 minutes.

    – Lightly wet the counter and your hands, scraping the dough out of the bowl onto the counter again. Use the knife or scaper to lift edges of the dough.

    – Grab the edges, lift and gently pull the dough to stretch it from the center. Release the edges onto the counter. Repeat on all four sides until a large rectangle is made.

    – Pick up one side of the stretched dough and fold it towards the center, covering about 1/3 of the remaining dough. Fold the other edge on top of the rest — effectively folding the dough in thirds.

    – Pull the top of the dough down halfway and then the bottom up over the top section. Now, you should have a folded dough in the size of a smaller square.

    – Move the dough to a dish, such as a Pyrex dish or Corning ware. Let dough rest covered for 45 minutes.

    – The dough should have expanded to the size of the dish. Wet hands and lift dough from center to let the top fold underneath. Repeat this until all sides have folded until the dough to make a small square again. Let dough rest for 45 minutes.

    – Repeat previous step at least three times, or until dough is puffy, feeling sturdy enough and has roundness in the edges.

    – Flour the counter and the bottom edge of the dough in the dish. Using floured hands, scrape the top of the dough out of the dish, then flip and let it slide out onto counter. Use your knife or scraper to bring flour under the dough.

    – Gently pull the top of the dough and fold halfway over the dough. Repeat for the bottom. 

    – Grab the side of the dough which has not been folded yet and roll it tightly into the dough, creating a loaf shape. Seal all seams in the loaf, including on the sides not rolled.

    – Dust dish meant for proving and top of dough with flour (brown rice or whatever is handy). Flip the dough into the proving dish with floured surface on the bottom. Cover and prove overnight in the fridge for 12-16 hours.

    – Preheat oven at 475 degrees with dutch oven inside.

    – Cut parchment paper in shape of bottom of dutch oven with two flaps for easy removal. Flip dough fresh out of fridge onto parchment paper on a flat surface. Transfer dough with parchment paper on the bottom to the preheated dutch oven.

    – Bake bread covered for 20 minutes.

    – Reduce heat to 450 degrees and bake bread uncovered for at least 10 minutes. Bake longer for a browner crust.

    -Enjoy!

    Did you make this recipe and have any suggestions? Make sure to leave a comment!

  • Sourdough starter

    Sourdough starter

    This recipe isn’t necessarily from The Bread, but they recommended I follow it for a week to get the perfect starter – and boy, is it bubbly! Making this starter can be hard, meticulous work, so buckle up for an extensive step-by-step, but it’s got a rewarding tang.

    This bad boy can make pretzels, pizza crust, bread, pancakes, cakes, biscuits and much more!

    Top tips from me:
    1) Get a mason jar or a pasta sauce jar and clean it out! This will be what you create your starter in, and make sure to leave the lip gently placed on top without screwing it on tight.
    2) Get. A. Lot. Of. Flour! Get as much whole wheat and all-purpose, maybe even bread, flour as you can. One big bag of each should suffice.
    3) Every baker ever, including The Bread, will tell you to carefully watch your starter as it rises and falls within 12-24 hours of feeding. Maybe mark where it starts with a marker or rubber band to see your progress.
    4) Don’t stress about precise feedings every 12 hours on the dot, but do make sure you feed it after it falls all the way before any brown liquid (called hooch) forms on the surface. That happened to me a couple times, so if it does to you, just pour that off the surface, stir and feed.
    5) Some bakers may be angry at me for this, but: if you don’t have a food scale, find a conversion chart for grams to cups and measure out your ingredients that way. This goes for the bread, too, and it worked just fine for me.
    6) Keep your starter in a warm place in the kitchen. Turning on my oven light and leaving my starter on the rack worked well for me; however, make sure you take the starter out when you preheat your oven for other stuff. Too much heat over 140 degrees can actually kill your starter since that’s too hot for yeast.
    7) A big stipulation for this recipe: I sometimes had to eyeball measurements to make sure the consistency was accurate based on the photos. Don’t be afraid to add some more flour or less water if needed.
    8) Also, it is totally fine to exclusively use all-purpose flour; however, The Bread recommends whole wheat flour to help speed up the fermentation process.

    Time:
    Assembling the starter will only take minutes, and feeding it each day will take about 10 minutes. Your starter should be steadily rising and ready to use within 6-9 days!

    Ingredients:
    TO CREATE YOUR STARTER: 100 g of whole wheat flour, 150 g of water
    FOR EACH DAILY FEEDING: 50 g of whole wheat flour, 50 g of all-purpose flour, 100-125 g of water

    *These feeding amounts may differ in the first few days, please refer to the instructions or the site that the recipe originates from.*

    Instructions: 

    – Assemble starter in clean jar and stir until flour is fully incorporated. Place in warm spot that will keep starter around 80 degrees F.- For the next two days: 24 hours after prior feeding, take out 75 g of starter and discard the rest. Clean the jar, add the starter, 50 g of whole wheat flour, 50 g of all-purpose flour and 125 g of water. Stir until incorporated and put back in warm spot.

    – For the next three days: use the same measurements as previous days, but increase frequency of feedings and make sure to feed every 12 hours (approximately). Then let starter rest overnight. You should start to see fermentation activity with bubbles.

    – A week later (and next few days if necessary): every 12 hours, discard mixture down to 50 g. Add in 50 g whole wheat flour, 50 g all-purpose flour and 100 g of water. Mix until fully incorporated and place back in warm spot. At this point, you should see your starter rise and fall predictably every day.

    – I’ve seen different tips for how to care for starters after they’ve begun fermenting, so typically you should continue to feed it once a day to your own standards, perhaps the measurements used in the last few days, if you plan to regularly use it. Otherwise, feel free to refrigerate your starter as a sort of hibernation before feeding again.

    Did you make this recipe and have any suggestions? Make sure to leave a comment!

  • Royal icing

    Royal icing

    The sweetness of powdered sugar mixed with the tangy meringue powder adds just enough sweet to the soft sugar cookies. The consistency of icing allowed it to set well on the cookies.

    A classic recipe everyone should know — plus, Meghan found the perfect combination that decorates well and tastes good.

    Top tips from me:
    1) This recipe may seem simple and easy, but getting the consistency right so that the icing can set well can be tricky. Meghan recommends adding a teaspoon of water at a time until the consistency is just right (not too wet but not too thick). There are about 3 teaspoons in each tablespoon, so just run the mixer while adding them. I did about 7-8 teaspoons.
    2) Gel food coloring is better to use for more vibrant colors, but I only had regular food coloring. That worked just fine as well.
    3) Use disposable piping bags to pipe the icing onto the cookie. I used ones from Wilton’s baking ware and they worked just fine. If you’ve never piped before, make sure to push the icing towards the tip of the bag, twist the top to create pressure and then cut a small hole in the tip of the bag.
    4) Line the shape you want on your cookie, let that dry, then flood the cookie with icing just so there’s enough there. Then take a toothpick and using the flat edge, spread the icing to cover the whole shape on the cookie. 

    Time:
    This recipe yields a lot of cookies – probably about 3-4 dozen. Additionally, make sure you leave enough time. It will take about 30 minutes to make the meringue then another 2 hours to bake the cookies.

    Ingredients:
    2 cups confectioners sugar —1 tbsp meringue powder — 3 tbsp water

    Instructions:

    – Beat all ingredients together until stiff peaks form (4-7 minutes). You may have to add more water depending on the weather. Add a teaspoon at a time while mixing to achieve desired consistency.

    Did you make this recipe and have any suggestions? Make sure to leave a comment!

  • Sugar cookies

    Sugar cookies

    These sugar cookies are perfectly chewy while being sturdy enough to keep their shape and easy to frost. The dash of salt cuts through the sweetness for the ideal bite.

    Making chewy, buttery sugar cookies and decorating them to the nines is the perfect quarantine activity.

    Top tips from me:
    1) Meghan’s number one tip is to not let the cookies brown in the oven. A few of mine were too thin so they did, as you can tell by the photo, but otherwise: heed her warning so they stay chewy!
    2) Preheat your oven for at least a half-hour so that the temperature is even through-out, Meghan says.
    3) Sift all your flour and baking soda to make sure they are no clumps!
    4) My dough did not clump up in the bowl, so I poured the crumbs over some laid out plastic wrap then kneaded it a little with my hands into a disc.
    5) Make sure to chill your dough for at least an hour. You can leave it in the fridge overnight as well. This will help it keep its shape.
    6) Don’t roll the dough too thin! Make sure it’s about a quarter of an inch or so, otherwise some cookies with rip or break or brown just too much.
    7) Feel free to cut out a stencil to make a shape you’d like, similar to what I did with wax paper to make a shamrock, but a cookie cutter will absolutely make neater lines.

    Time:
    Assembling the dough will take about 20 minutes, then the cookies will bake for 8-12 minutes. They will also need at least 15 minutes to cool before icing. This recipe yields 2-3 dozen cookies, depending on the size cutter you use.

    Ingredients:
    2 cups all-purpose flour — 1/2 tsp salt — 1/2 tsp baking powder — 1/2 cup unsalted butter  — 1 cup sugar — 1 large egg — 1 tbsp high-quality vanilla extract

    Instructions: 

    – In a large bowl, cream butter, sugar, egg and vanilla until pale and fluffy.

    – Sift dry ingredients into the bowl, and mix until incorporated. 

    – Shape dough into discs, cover with plastic wrap and refrigerate for at least 1 hour or overnight.

    – Preheat oven to 350F. Line baking sheets with baking mats or parchment paper.

    – On a lightly floured work surface, roll out dough, cut into desired shapes, and transfer to prepared baking sheets, leaving an inch in between. Leftover dough can be rolled and cut once or twice more.

    – Bake until lightly golden, about 8-12 minutes depending on the size and your oven. Do not allow to brown.

    – Transfer to wire racks to cool for 15 minutes.

    – Decorate to your heart’s desire.

    Did you make this recipe and have any suggestions? Make sure to leave a comment!

  • Tomato basil cheezy bread

    Tomato basil cheezy bread

    DANGER: These are way too addictive. I’ve eaten so many already. The fluffy, eggy biscuit contrasts with the creamy sharp cheddar with a fresh burst from the tomatoes. The basil ties it all together to make a lovely pizza-tasting roll. 

    I once made a cheddar grilled cheese with these and it changed my life. Make these for a great lunch option!

    Top tips from me:
    1) Cut your butter into small chunks so it melts faster and the milk does not scald, Jaimie says. Also, make sure you use a large pot.
    2) Make sure you add one egg at a time when making the batter, otherwise you may not mix fast enough and some of the egg will cook into scrambled eggs!
    3) Definitely add the water to make sure the dough is more consistent and like a paste, otherwise, it will clump up and the mix-ins may not be fully incorporated.
    4) Instead of adding spring greens, I chiffon cut up about 10 large basil leaves and added those in. Perfect basil heaven, and I got to use my basil plant. I would definitely recommend fresh basil.
    5) Here’s an eating tip: Jaimie says it is absolutely essential that you toast your cheezy bread before eating it. I agree.
    6) Jaimie uses a scale and ounce measurements for her recipe since she’s a professional baker, but she was nice enough to give us approximations so if you don’t have a scale, you can still make these.

    Time:
    Assembling the dough will take about 30 minutes, depending on your knife skills and how long it takes for your milk and butter to boil, then the rolls will bake for another 45-60 minutes. This recipe yields 1 dozen sandwich-sized rolls or 2 dozen dinner rolls.

    Ingredients:
    12 oz. whole milk (a cup and a half) — 6 oz. butter, cut in small pieces (one and a half sticks) — 11 oz. potato starch (about 2 cups) —1 tsp salt 12 oz. egg (about 5 eggs) —1 tsp mustard — Water to adjust — 2 cups cheese — 1 cup diced tomatoes —1/2 cup fresh spring greens, chopped or chiffon cut — 1 dried tbsp basil

    Instructions: 

    – Boil milk & butter together in a heavy-duty pot (temp. 320, takes about 10 minutes to come to a rolling boil).- While that is boiling, whisk together potato starch and salt in a large bowl

    –  Scale eggs and mustard into a large measuring cup, do not mix.

    – Scale cheese and mix-ins into another cup.

    – Pour potato starch and salt into the pot with milk and butter and stir to combine.

    – Add contents of pot to a bowl and mix on medium.

    – Add eggs one at a time with mixer running.  

    – Add cheese and mix-ins. Beat on medium-high for 60 seconds or until it’s a nice consistent light-colored paste, not separated.  Add 2-6 oz. additional water if necessary: you’re looking for a stiff peak when you pull the paddle out.

    – Scoop about 1/2 cup of mixture 1 inch apart on parchment-lined sheet.

    – Brush eggwash on top of rolls.

    – Bake at 325 for 45-60 minutes until they are light for their size and reach an internal temperature of 200 degrees.

    Did you make this recipe and have any suggestions? Make sure to leave a comment!

  • Vegan meringue cookie

    Vegan meringue cookie

    These tangy clouds have the most satisfying crunch but still, melt in the mouth. The perfect Valentine’s Day cookie without too much decadence!

    These meringues are the perfect office-friendly snack that everyone can enjoy. My coworkers loved them!

    Top tips from me:
    1) Look up what a stiff peak looks like before setting off on deciding whether your meringue is ready. Mine was definitely underdone, but they still came out delicious.
    2) I added a drop of raspberry extract and red food coloring to make these light pink beauties. Jaimie said you could try chopping up freeze-dried fruits and folding them in, such as strawberries. I couldn’t find any at my local grocery store so I went the extract route. Make sure they’re dried though because juice from the fruit will ruin the meringue while baking!
    3) This recipe yields a lot of meringue so make sure you have a lot of cookie sheets or the time and patience to do two rounds of cookies.
    4) Jaimie also makes these for cakes sometimes and adds them on as marshmallows. To do so, you would refrigerate them immediately after baking and they would get gooey. To keep them light and crunchy, store them at room temperature. They’ll stick together if you immediately put them all in the fridge.

    Time:
    This recipe yields a lot of cookies — probably about 3-4 dozen. Additionally, make sure you leave enough time. It will take about 30 minutes to make the meringue then another 2 hours to bake the cookies.

    Ingredients:
    12 oz. chickpea water — 2 tsp cream of tartar — 3 cups sugar

    Instructions:

    – In a small bowl, combine chickpea water and cream of tartar.  Mix on high for 2 minutes. 

    – Slowly add sugar, 1 tbsp at a time, until stiff peaks form (may not have to add all the sugar, start watching closely after 2 cups are in there.)

    – OPTIONAL: add food color and flavor (be careful, VERY sparingly, 1 drop) and hand-fold-in.

    – Scoop about 2 tbsp onto parchment lined paper. Top with sprinkles.

    – Bake at 220 degrees for 2 hours or until fully dried through and light for their size.

    Did you make this recipe and have any suggestions? Make sure to leave a comment!

  • Rosemary ginger mule

    Rosemary ginger mule

    The fresh rosemary and the sweet ginger syrup are the stars of this refreshing drink. My roommate and I both gulped down the drink, which tasted just like a ginger mule sans vodka. I’ll be making it again, especially in the summer and for any parties.

    I used to think the only non-alcoholic drink that was worth the money was mango juice. These are so refreshing though!

    Top tips from me:
    1) Laura recommends “spanking” the rosemary before adding it, and while that practice sounds like a practical joke, it actually does kick up the aroma, and subsequently, the flavor of the herb.
    2) Make sure you mix everything well, otherwise the ginger syrup will stay separated at the bottom of your glass.
    3) It may look classier in a copper mug, but alas, I do not own one.
    4) You can add any shrub or concentrate to enhance the flavor of the drink, but Element Shrub’s cranberry hibiscus, which Laura suggested, has enough of a bitter taste to cut through the sweet ginger syrup.
    5) For the rosemary-infused ginger syrup, I could only find ginger syrup at my local Giant, and I ran out of time to let it sit with some rosemary. Feel free to use just the syrup and then add the rosemary after.
    6) Laura also suggested Q Drinks brand ginger beer since she likes the spice, though I could only find Goslings. Use whatever brand you’d like!

    Time:
    This recipe takes a solid five minutes or so, depending on how meticulous you are with your drinks. 

    Ingredients:
    A stalk of fresh rosemary, spanked — one lime, for the juice and slices for garnish — rosemary-infused ginger simple syrup — ginger beer — ice — 1 oz Element Shrub, ginger lime or cranberry hibiscus

    Instructions:

    – Pour a squeeze of rosemary ginger syrup and squeeze the juice from half a lime into a 10-12 oz glass. Stir.

    – Add ice.

    – Add in 4-5 oz of ginger beer. Stir.

    – Top with 1 oz of Element Shrub.

    – Garnish with a sprig of rosemary and wedge of lime. Enjoy!

    Did you make this recipe and have any suggestions? Make sure to leave a comment!